
How to send emails with Gmail using NodeJs and nodemailer
In this tutorial we will show how to send emails with NodeJs using nodemailer and Gmail. This tutorial will require some steps to be taken in order to get Gmail to work correct with the OAuth setup. If you want a shorter (but not as reliable) guide, check this guide out where we do the same but using Yahoo instead.
Set up OAuth
Before we start writing any code, we need to set up OAuth to enable the authentication process for sending emails with our Gmail account.
I will try to make it as clear as I can, and share images on the important parts.
-
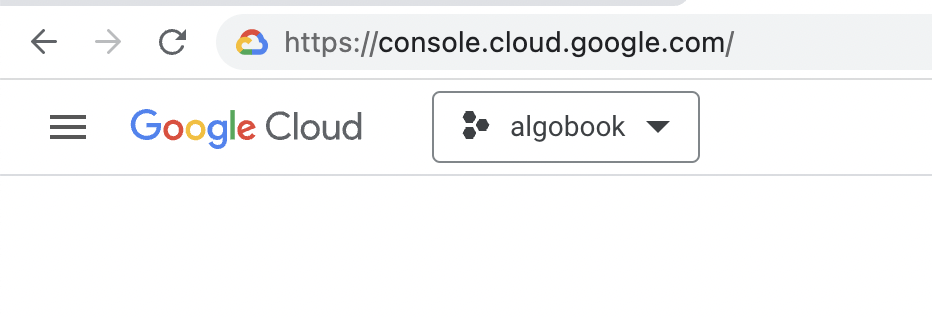
Head over to Google dev console and create a new project if you haven't one already. Click on the arrow and click on New project and fill in the form.
-
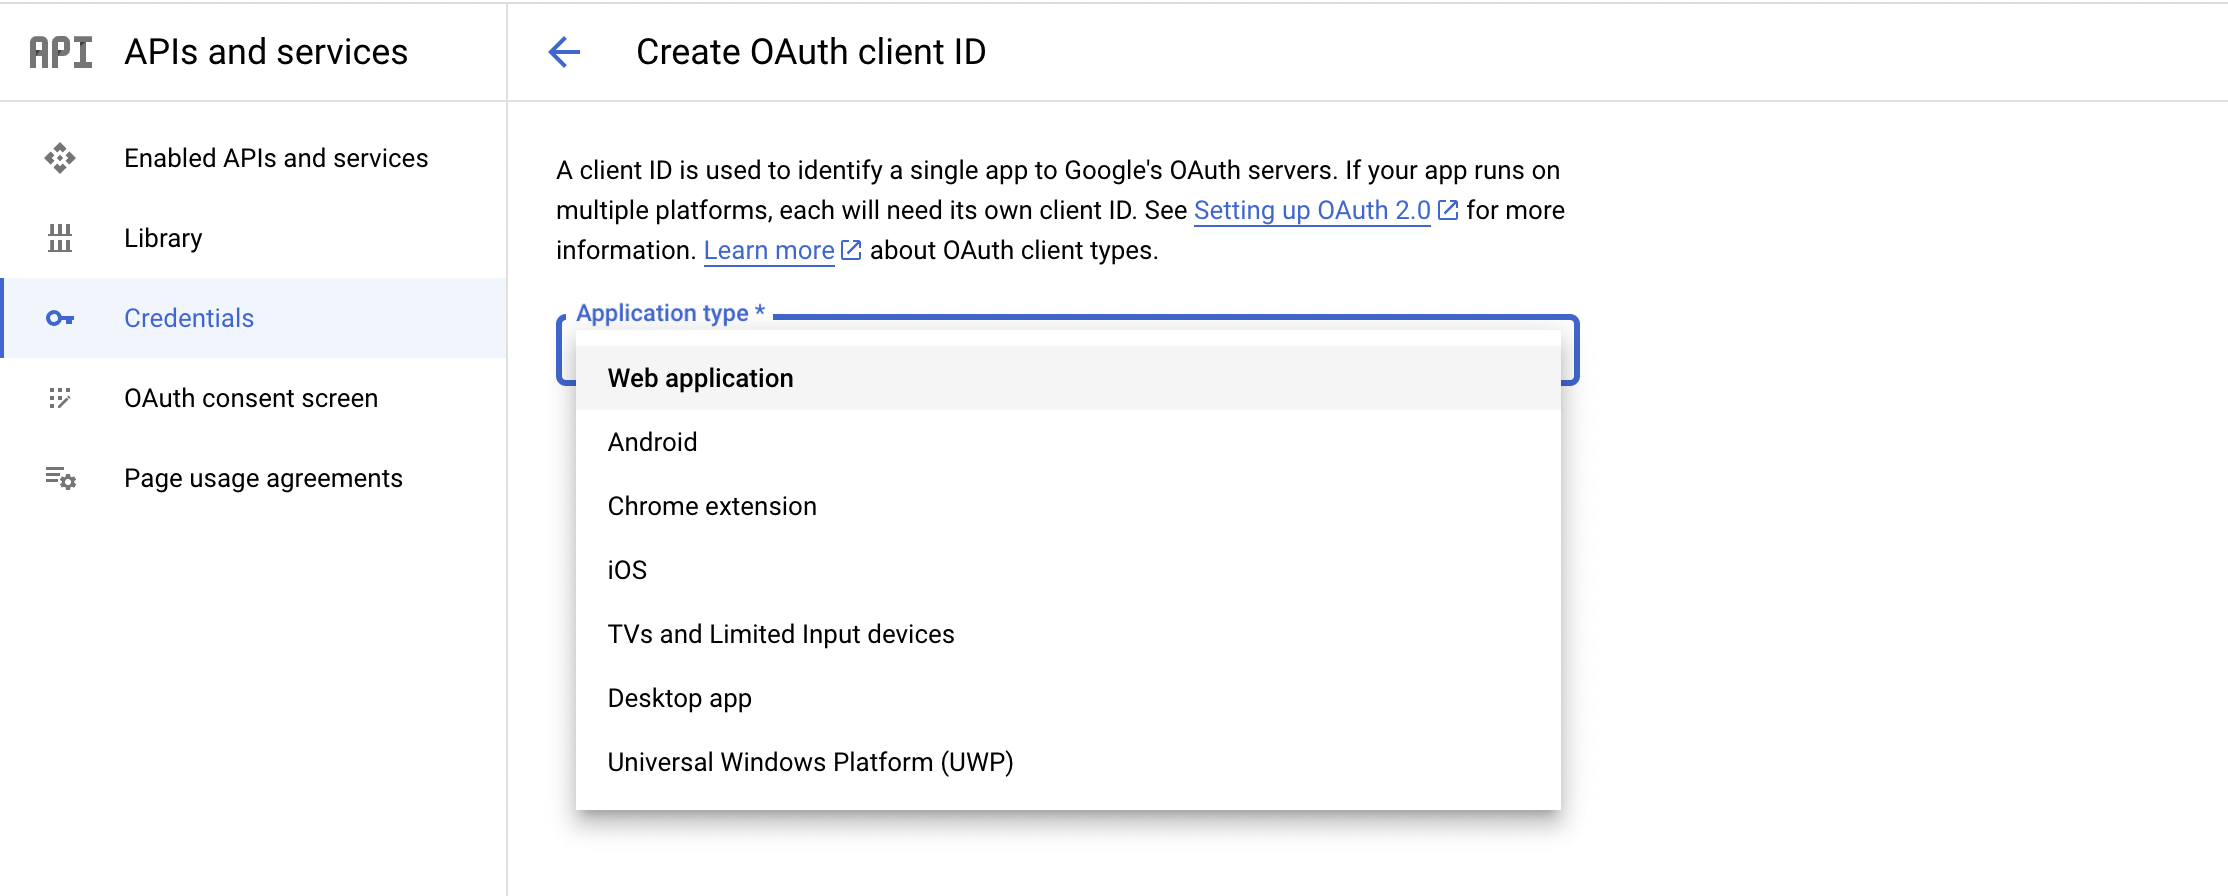
Search for APIs and services and click on Credentials in the menu.
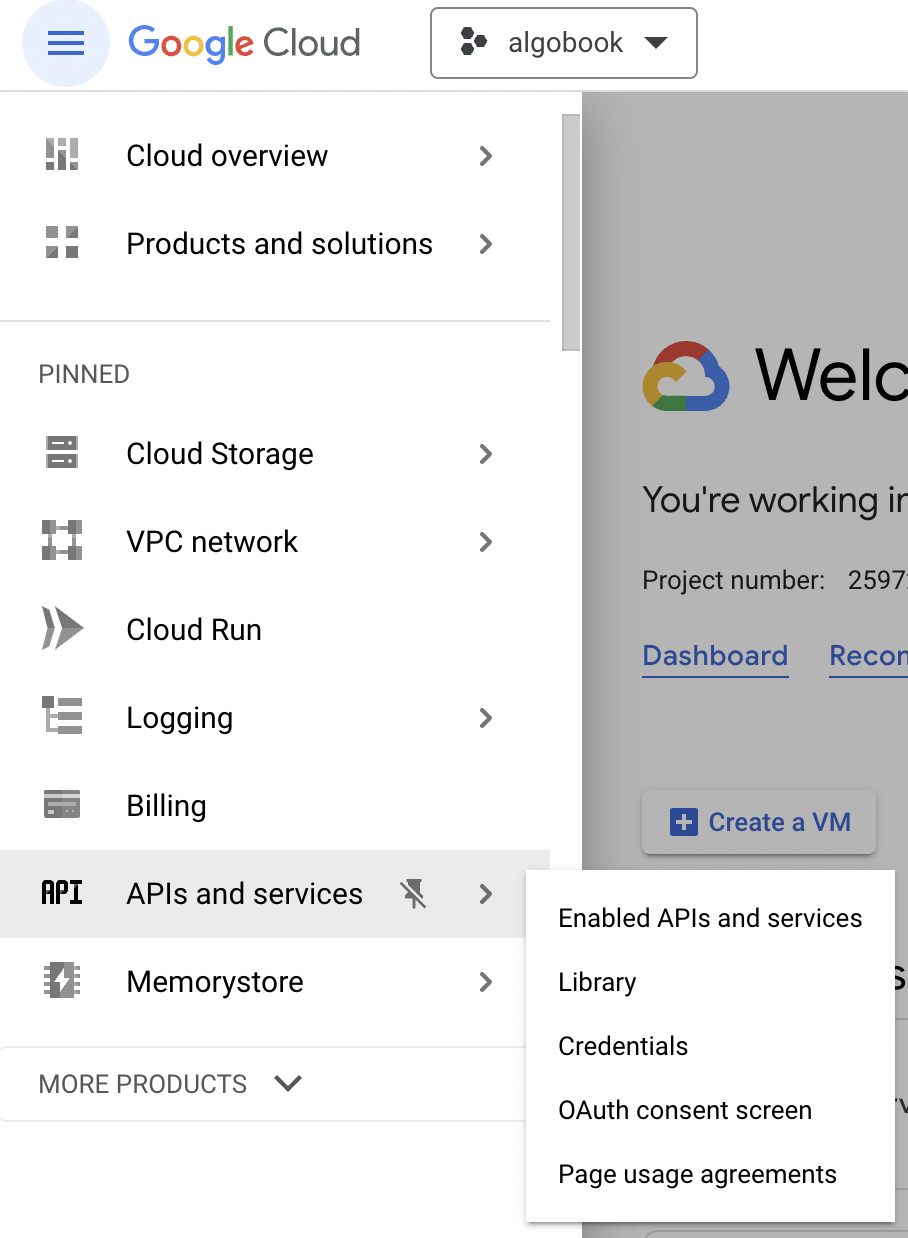
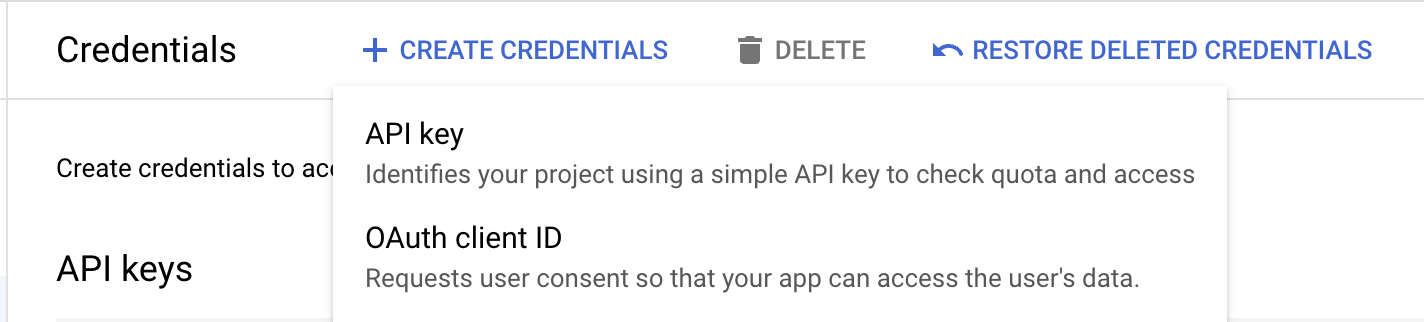
And then click on Create credentials and select OAuth client ID in the dropdown.
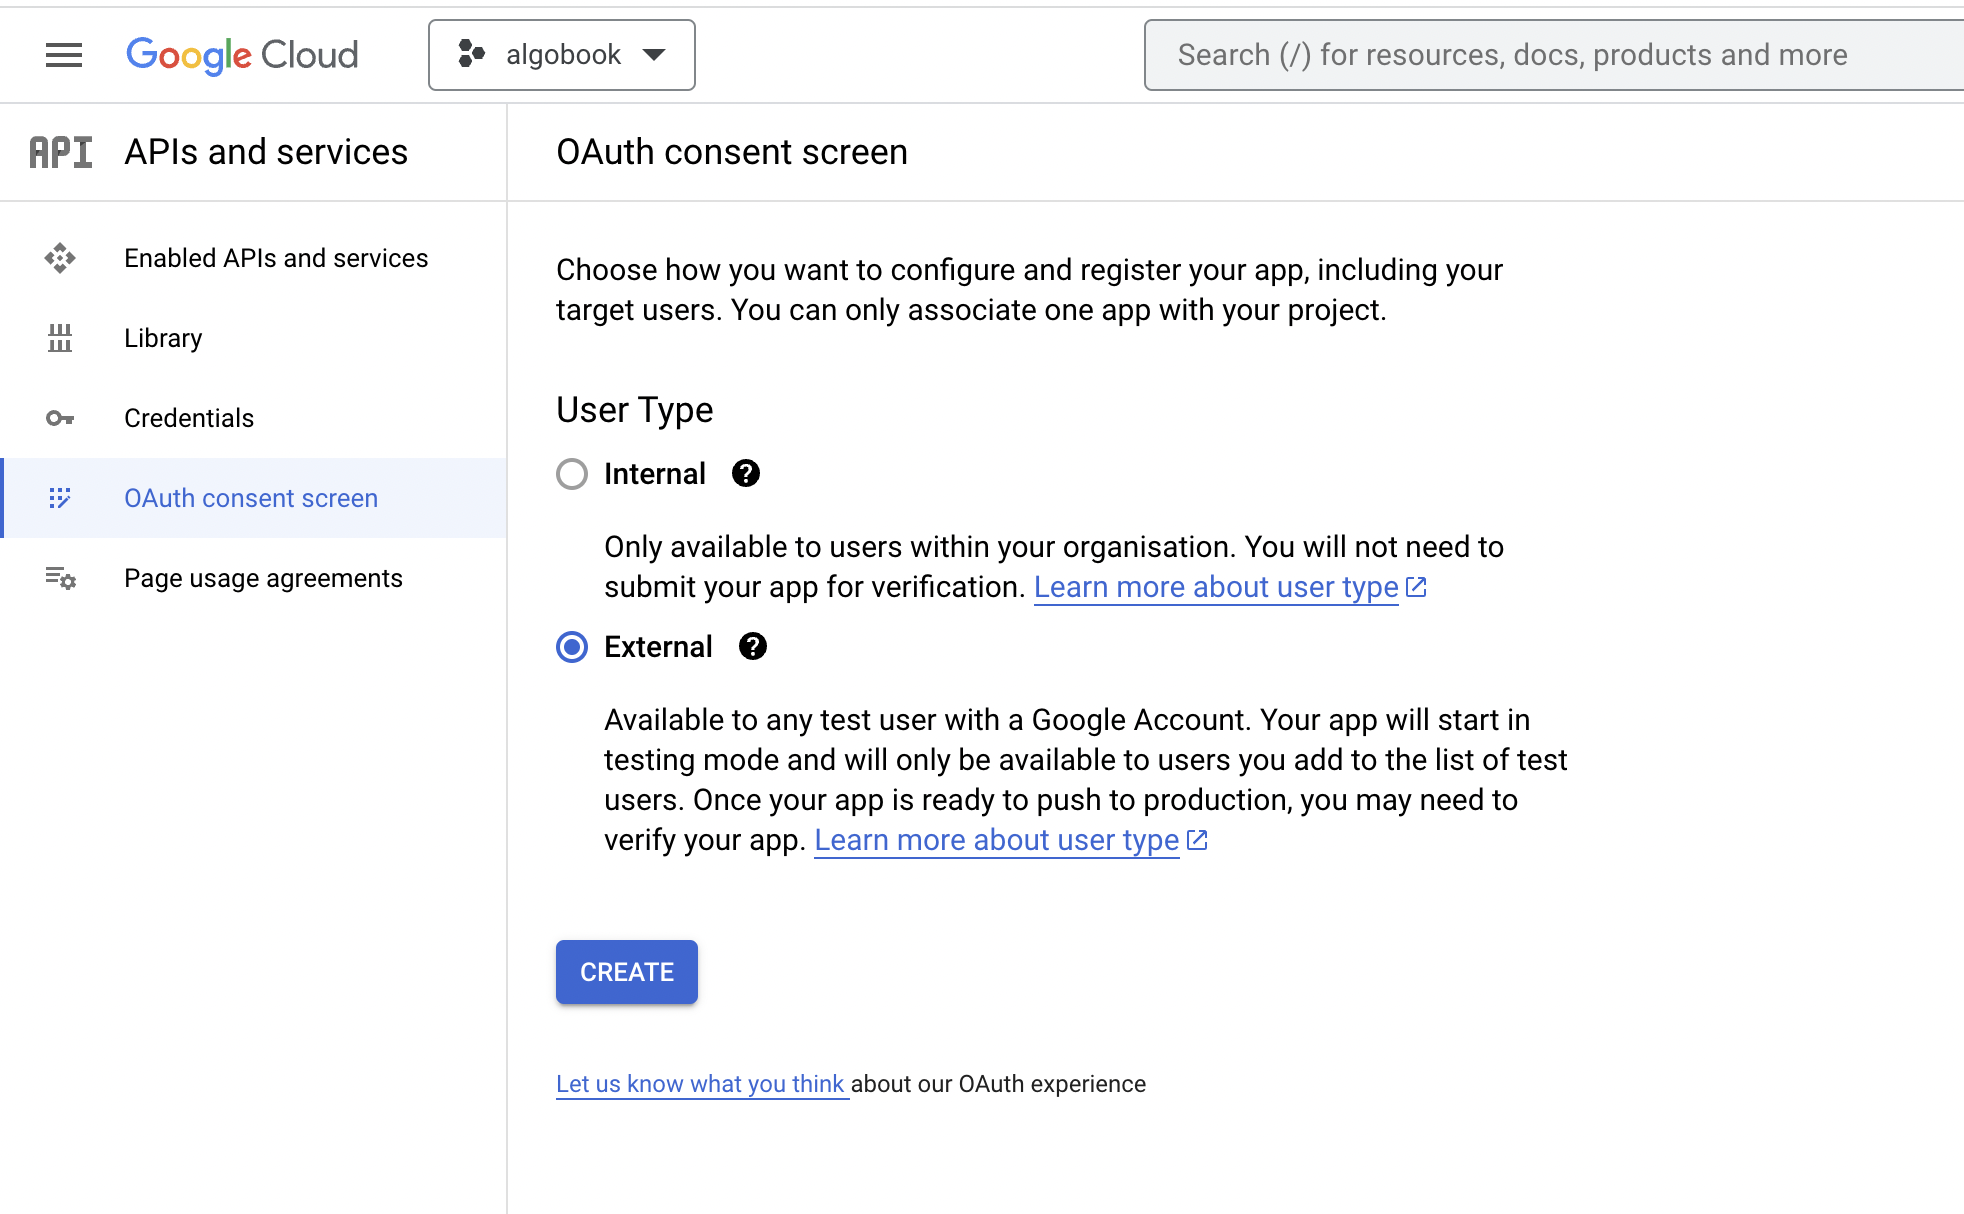
- Click on Configure consent screen.

- Select External and Create the consent screen.
There will be a form to fill in, with some steps - information such as contact email, users that should be allowed to use the OAuth API etc should be filled in. When you are done, click on the Back to Dashboard button.

- Click on Create Credentials again, and now you should see another view if everything is setup correctly. Click on Web application in the dropdown.
Fill in the form, such as the application name and most important, add
https://developers.google.com/oauthplayground
in the Authorized redirect URIs section.
Click on Create and download the Client ID and Client Secret.
-
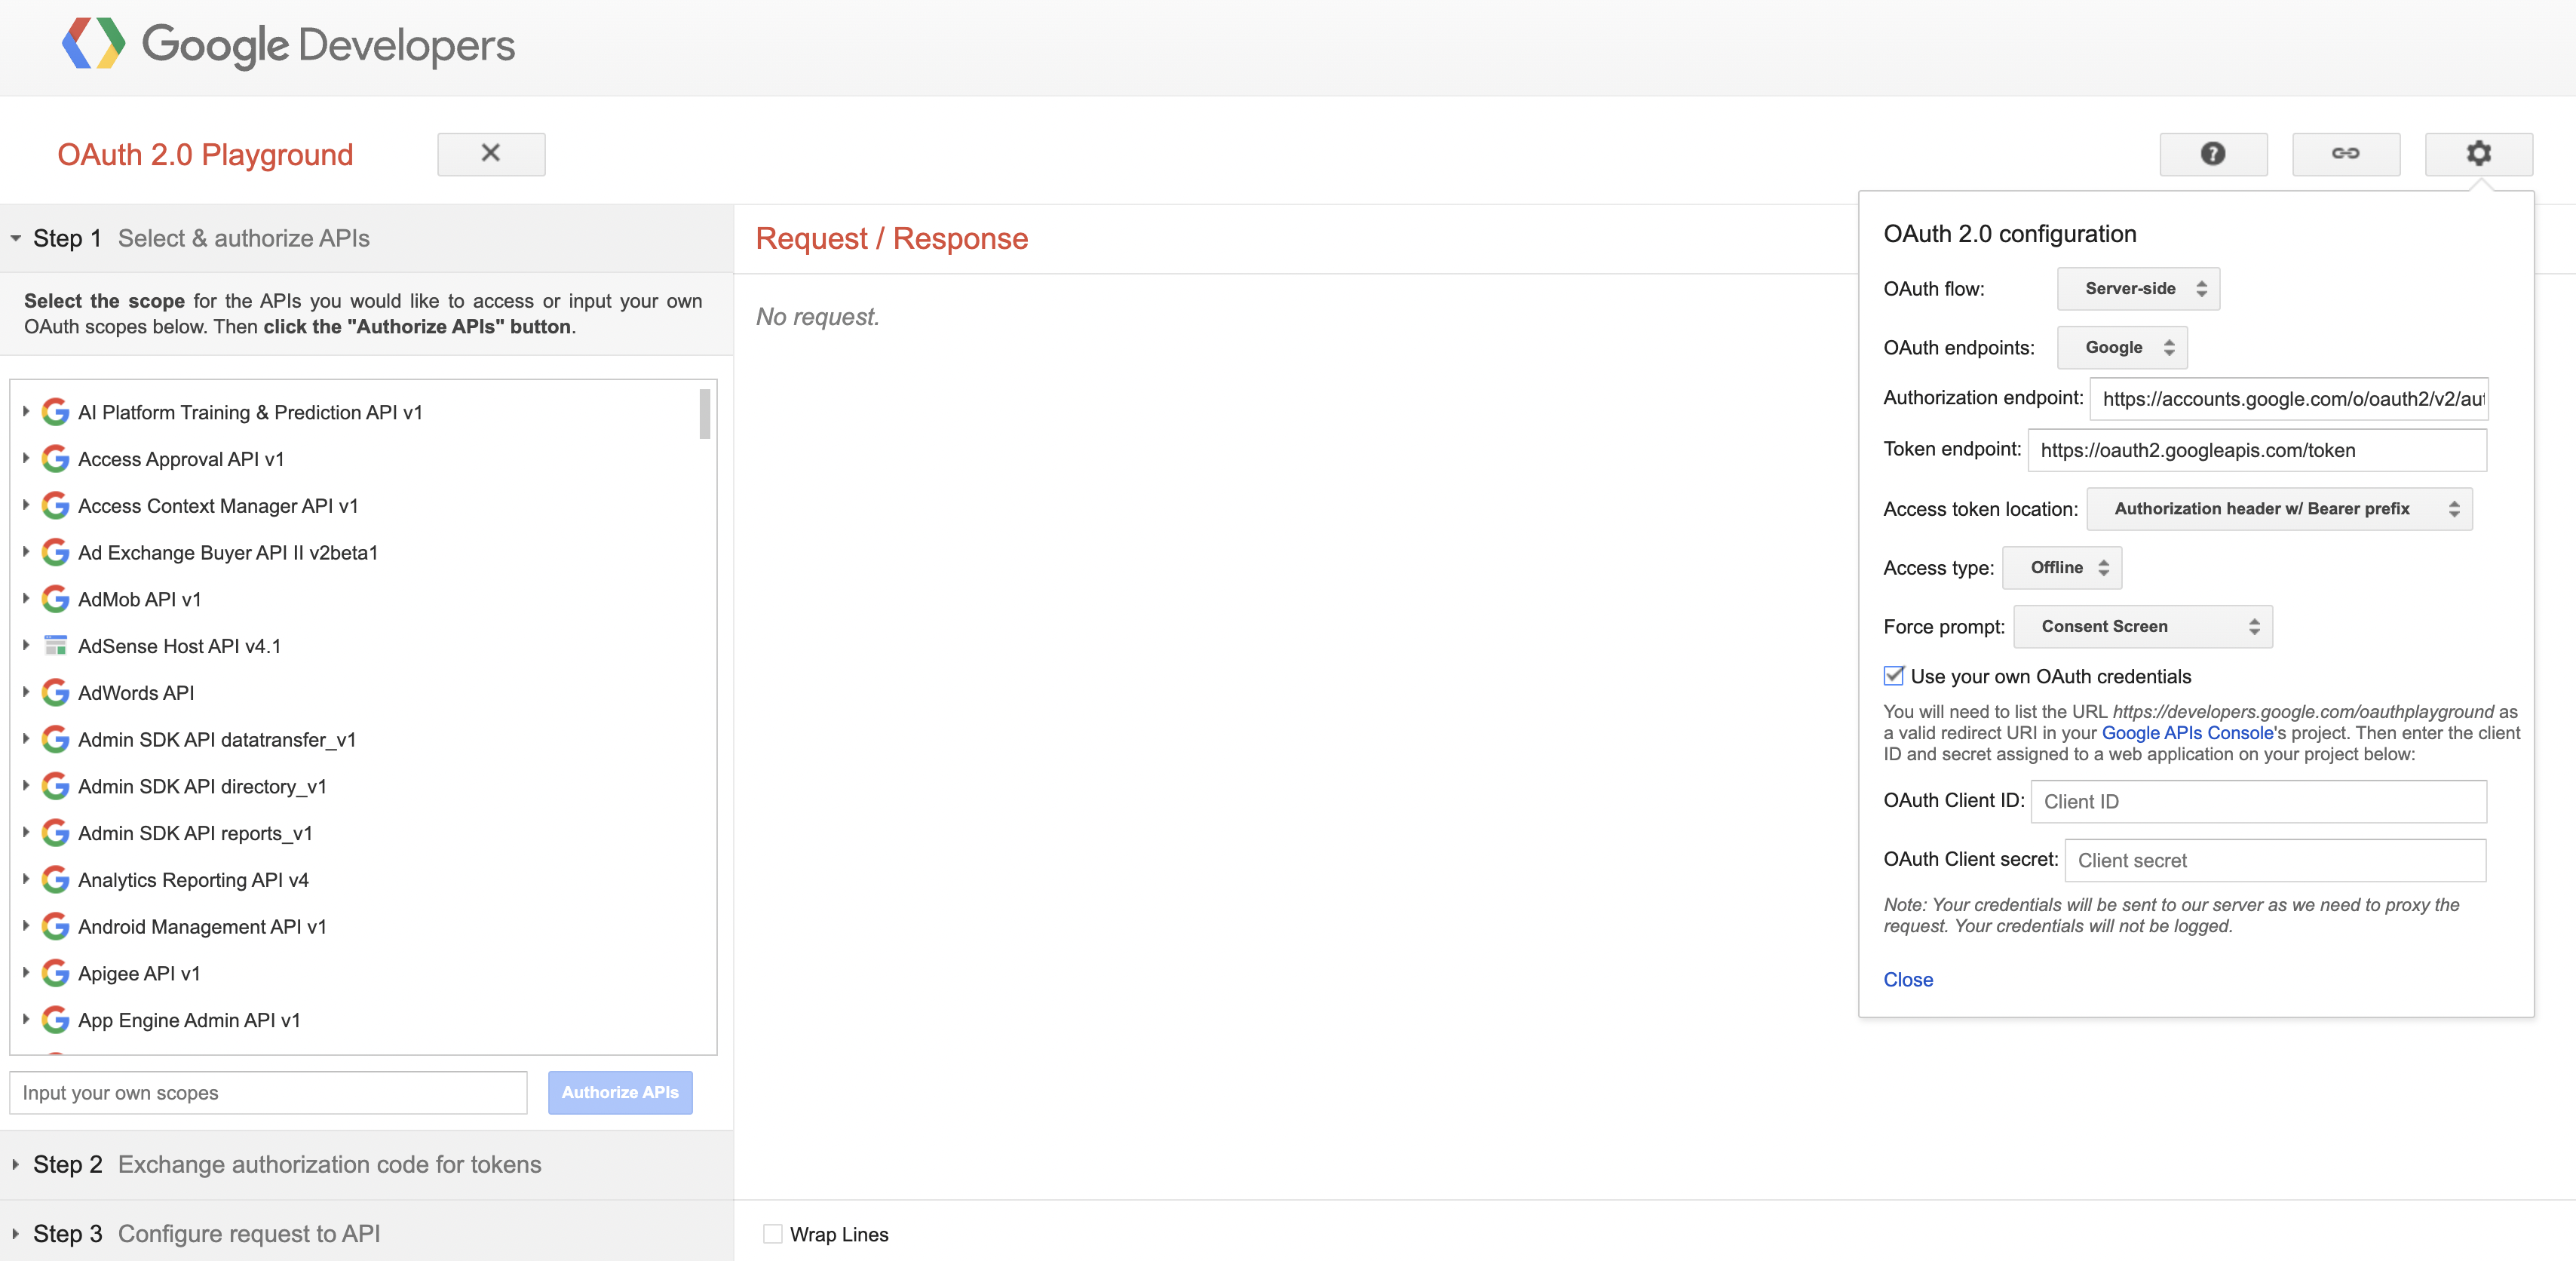
Now we will create our refresh token. Head over to Google Developers.
-
Click on the settings wheel on the top right corner and tick the Use your own OAuth credential checkbox and paste in your Client ID and Client Secret from before.
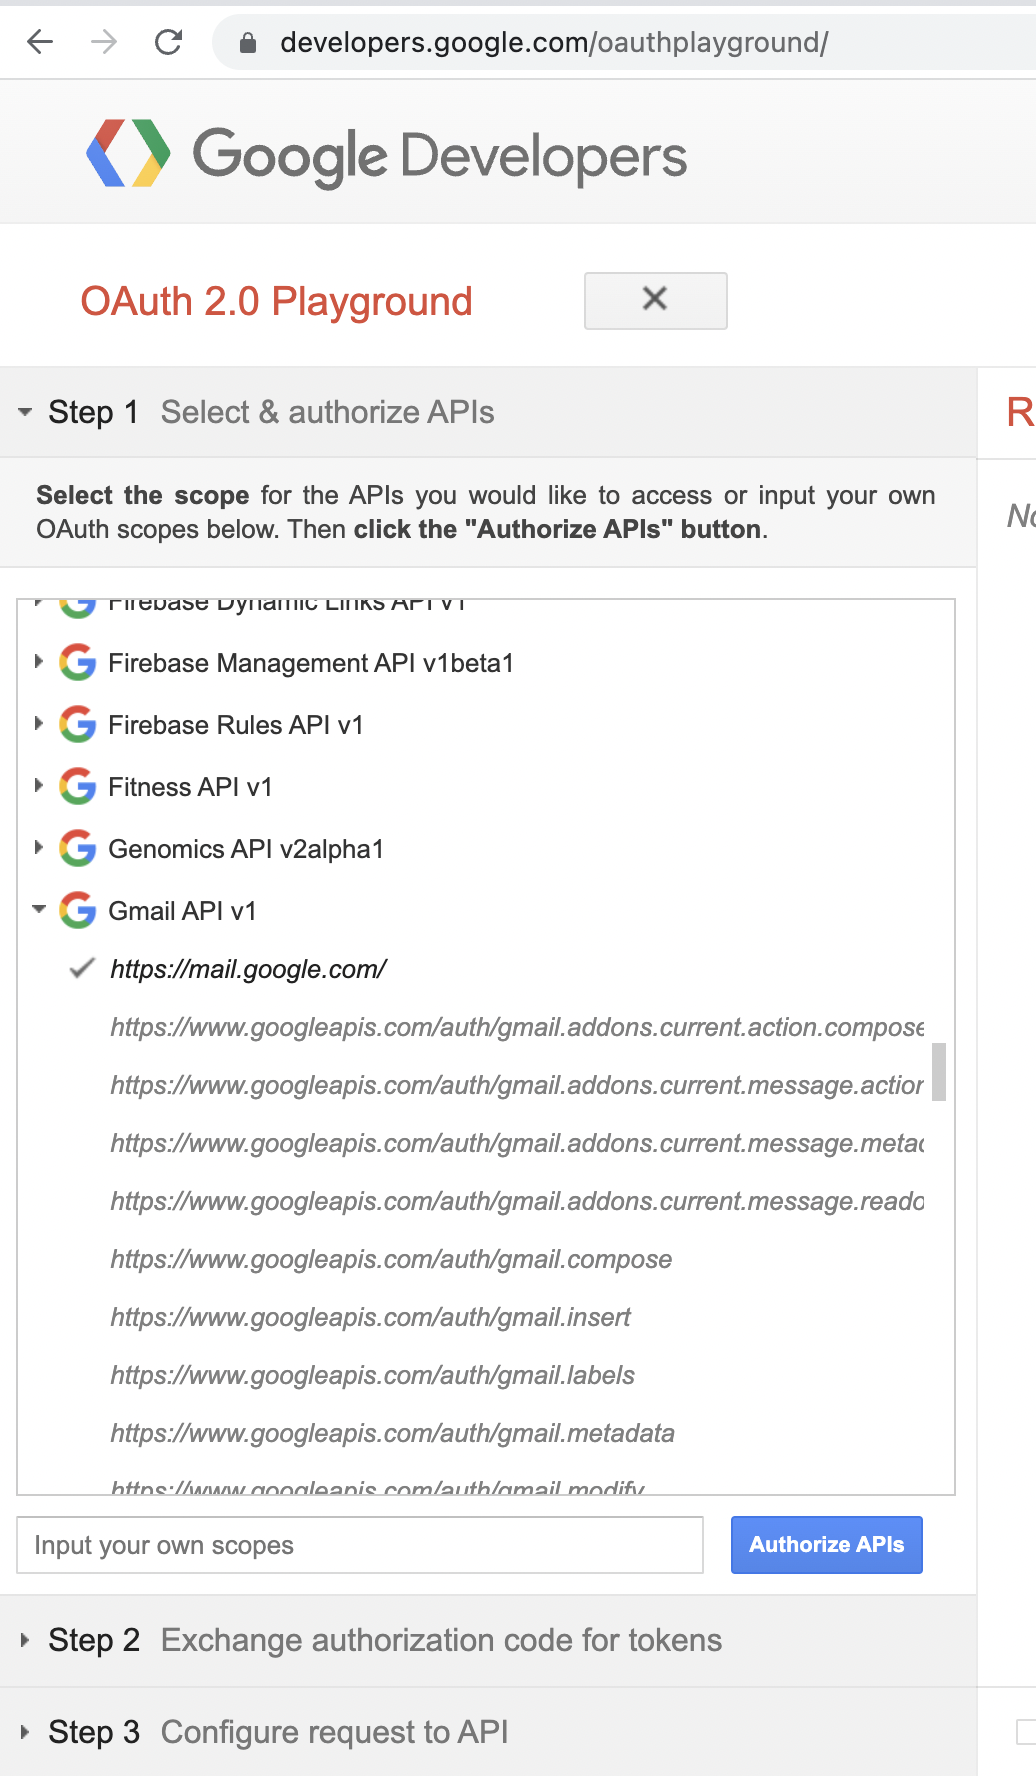
- Find the Gmail API in the left menu and choose https://mail.google.com/ and then click on Authorize APIs.
- You will now be prompted to another view where you need to choose which mail you want the API to get access to, and then authorize it. You will then get a view where you should Exchange authorization code for tokens. And then you will get the refresh token.
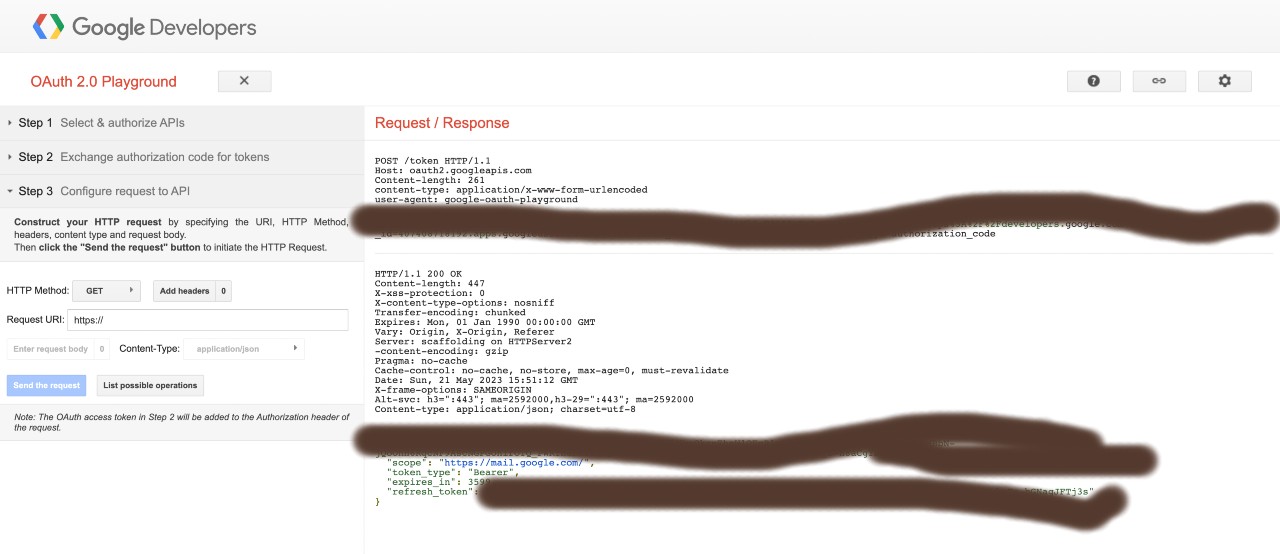
- Copy the refresh token. And then we are DONE!
Write our code
Now, let's do some coding. Head over to your NodeJs project, and install the dependencies.
npm i nodemailer googleapis
Create a file called mailService.js. Let's start with importing our dependencies.
const nodeMailer = require("nodemailer");
const { google } = require("googleapis");
const OAuth2 = google.auth.OAuth2;
And then, we will create an object with our credentials. Note that if you are pushing this code to Github or similar, make use of environment variables instead, or something like secret manager in Google Cloud Console or similar to make it more secure. Secrets should never be exposed. But for this example, we will keep it in the code.
const GOOGLE_AUTH_TOKENS = {
  EMAIL: "your_email@gmail.com",
  REFRESH_TOKEN: "refresh_token",
  CLIENT_ID: "CLIENT_ID",
  CLIENT_SECRET: "CLIENT_SECRET",
};
Now, we will create our class and add a class variable called _transporter which will be our mail transporter.
class MailService {
  _transporter;
}
Then, we will create a function for getting our accessToken from Google
  async getGoogleAccessToken() {
    const oauth2Client = new OAuth2(
      GOOGLE_AUTH_TOKENS.CLIENT_ID,
      GOOGLE_AUTH_TOKENS.CLIENT_SECRET,
      "https://developers.google.com/oauthplayground"
    );

    oauth2Client.setCredentials({
      refresh_token: GOOGLE_AUTH_TOKENS.REFRESH_TOKEN,
    });

    const token = await oauth2Client.getAccessToken();
    return token;
  }
Let's setup our _transporter next. We will provide nodemailer with our authentication tokens, client id etc from Google.
async setupTransporter() {
    const accessToken = await this.getGoogleAccessToken();

    this._transporter = nodeMailer.createTransport({
      service: "gmail",
      auth: {
        type: "OAuth2",
        user: GOOGLE_AUTH_TOKENS.EMAIL,
        accessToken,
        clientId: GOOGLE_AUTH_TOKENS.CLIENT_ID,
        clientSecret: GOOGLE_AUTH_TOKENS.CLIENT_SECRET,
        refreshToken: GOOGLE_AUTH_TOKENS.REFRESH_TOKEN,
      },
      tls: {
        rejectUnauthorized: false,
      },
    });
  }
And then, at last, we will implement our sendMail function. We will make the function accept three arguments - recipient, subject and text.
  async sendMail(recipient, subject, text) {
    const mailOptions = {
      from: GOOGLE_AUTH_TOKENS.EMAIL,
      to: recipient,
      subject: subject,
      text: text,
    };

    try {
      await this._transporter.sendMail(mailOptions);
      return { status: "SUCCESS" };
    } catch (err) {
      return { error: err };
    }
  }
And that's it. Note that we can do so much more with nodemailer, like creating html templates and attaching files etc. But to keep this tutorial somewhat short, I will keep it as is with just sending a plain text.
Full code
const nodeMailer = require("nodemailer");
const { google } = require("googleapis");
const OAuth2 = google.auth.OAuth2;

const GOOGLE_AUTH_TOKENS = {
  EMAIL: "your_email@gmail.com",
  REFRESH_TOKEN: "refresh_token",
  CLIENT_ID: "CLIENT_ID",
  CLIENT_SECRET: "CLIENT_SECRET",
};

class MailService {
  _transporter;

  async getGoogleAccessToken() {
    const oauth2Client = new OAuth2(
      GOOGLE_AUTH_TOKENS.CLIENT_ID,
      GOOGLE_AUTH_TOKENS.CLIENT_SECRET,
      "https://developers.google.com/oauthplayground"
    );

    oauth2Client.setCredentials({
      refresh_token: GOOGLE_AUTH_TOKENS.REFRESH_TOKEN,
    });

    const token = await oauth2Client.getAccessToken();
    return token;
  }

  async setupTransporter() {
    const accessToken = await this.getGoogleAccessToken();

    this._transporter = nodeMailer.createTransport({
      service: "gmail",
      auth: {
        type: "OAuth2",
        user: GOOGLE_AUTH_TOKENS.EMAIL,
        accessToken,
        clientId: GOOGLE_AUTH_TOKENS.CLIENT_ID,
        clientSecret: GOOGLE_AUTH_TOKENS.CLIENT_SECRET,
        refreshToken: GOOGLE_AUTH_TOKENS.REFRESH_TOKEN,
      },
      tls: {
        rejectUnauthorized: false,
      },
    });
  }

  async sendMail(recipent, subject, text) {
    const mailOptions = {
      from: GOOGLE_AUTH_TOKENS.EMAIL,
      to: recipent,
      subject: subject,
      text: text,
    };

    try {
      await this._transporter.sendMail(mailOptions);
      return { status: "SUCCESS" };
    } catch (err) {
      return { error: err };
    }
  }
}

module.exports = MailService;
Send mail
Now, we will consume our service, and send some mails.
const MailService = require("./mailService");

const mailService = new MailService();

(async () => {
  await mailService.setupTransporter();
  const response = await mailService.sendMail(
    "myFriend@mail.com",
    "My first NodeJs mail",
    "Hello friend, this mail is from my NodeJs server!!!"
  );

  if (response.error) {
    console.log("Error", response.error);
  } else if (response.status === "SUCCESS") {
    console.log("WE DID IT!!!");
  }
})();
And now, the emails should be sent successfully. If not, contact me and we will sort it out together. Send a message here.
Outro
Puh, this was a long tutorial. But I hope you got it to work. I struggled a bit with other mail providers, and decided to go with Gmail as well. The setup took some time, but when everything was configured, I find it working really well. If you have any issues, please contact me and I will see if I can assist in any way.
Thanks for reading, and have a great day!
 Mon May 22 2023
 How to create and decode QR codes in NodeJsIn this tutorial, we will show how we can create QR codes using NodeJs and also how to decode already created QR codes.
 Introduction to web scraping with PuppeteerA guide on how to scrape a website using Puppeteer. We will see how we can retrieve the content of https://react.dev and print in the console.
 Build a full stack application with React and NodeJsA tutorial on how to build a simple full stack application with React in the client side and NodeJs in the backend.
 How to convert a text file and its content to a JSON file with correct structureA guide on how to create a JSON file from a txt file in NodeJs. We will also make sure that the content is formatted in correct JSON format.
 How to send email in NodeJs with a Yahoo mail using nodemailerA tutorial on how to send emails in NodeJs using nodemailer. Our sender email will be a Yahoo address and we will cover how to authenticate using app passwords.
 Fast and easy way to secure your Node express API using HelmetA quick guide on how to secure a Node express API with helmet.
 Hash passwords in NodeJs using bcryptA tutorial on how to use bcrypt in NodeJs to hash passwords and compare them afterwards.
 Setup puppeteer with DockerIn this guide we will show how to setup a puppeteer service in NodeJs with Docker.
 Introduction to caching in a NodeJs APIIn this guide we will show how we can set up a simple cache in NodeJs. We will use node-cache library from npmjs.com in this article.
 How to parse XML data to JSON in NodeJsIn this tutorial, we will show how we can parse XML in NodeJs in to a JSON object. We will use fast-xml-parser library in this guide.