
How to deploy a Create React Application to Cloud Run with Cloud Build using Github trigger
In this tutorial, we will go through how we can deploy a React application what is created by create-react-app to Cloud Run. We will use Cloud Build and a trigger from Github that will setup a continuous integration and be deployed on push to main branch.
Prerequisites
- A GCP account and a project set up. Create a project here.
- A Github repo for your project
1. Dockerfile
We need to have a Dockerfile in our project, in order for Cloud Build to create an image to artifactory. If you haven't already created one, lets do it together.
Add Dockerfile to the root of the project, and copy paste the following config.
# ==== CONFIGURE =====
# Use a Node 16 base image
FROM node:16-alpine
# Set the working directory to /app inside the container
WORKDIR /app
# Copy app files
COPY . .
# ==== BUILD =====
# Install dependencies (npm ci makes sure the exact versions in the lockfile gets installed)
RUN npm ci
# Build the app
RUN npm run build
# ==== RUN =======
# Set the env to "production"
ENV NODE_ENV production
# Expose the port on which the app will be running
EXPOSE 8080
# Start the app
CMD [ "node", "index.js" ]
NOTE - In the last step, we are starting our web server with the command node index.js. There can be many ways of serving the application, if you don't have an index.js in your project, which create-react-app doesn't have per default, you can use e.g CMD [ "npx", "serve" "build" ] to just serve the build.
The reason why we use the node index.js is because if the project are using the History API for client side routing like React Router, we need some special treatment to handle a deeplink to a specific page or if the user are refreshing the page while standing on a page. E.g if the route is /todos/123 and the user is refreshing the page, the production build won't find it. More info can be found on Create React App homepage Hence, we need to setup our server to handle these scenarios. In the next step we will add an express server for this scenario. If you don't have client side routing, you can skip the next step.
2. Setup express server to handle deep linking (Optional)
As previously mentioned, if the project are using a client side routing, we will need to handle the routing.
Let's create a file called index.js in the root of the project, and add following code to it.
const express = require("express");
const path = require("path");
const app = express();

app.use(
  express.static(
    path.join(__dirname, "build")
  )
);

app.get("*", function (req, res) {
  res.sendFile(
    path.join(__dirname, "build", "index.html")
  );
});

app.listen(8080);
That's it. Now our server will handle all requests, and serve the index.html and let React router handle the rest.
3. Create a Cloud Run service with Github integration
So, let's move over to GCP and start creating or Cloud Run service.
- Search for Cloud Run or select it from the menu
- Click on
Create service - Tick in the box
Continuously deploy new revisions from a source repository - Click on
Set up Cloud Build
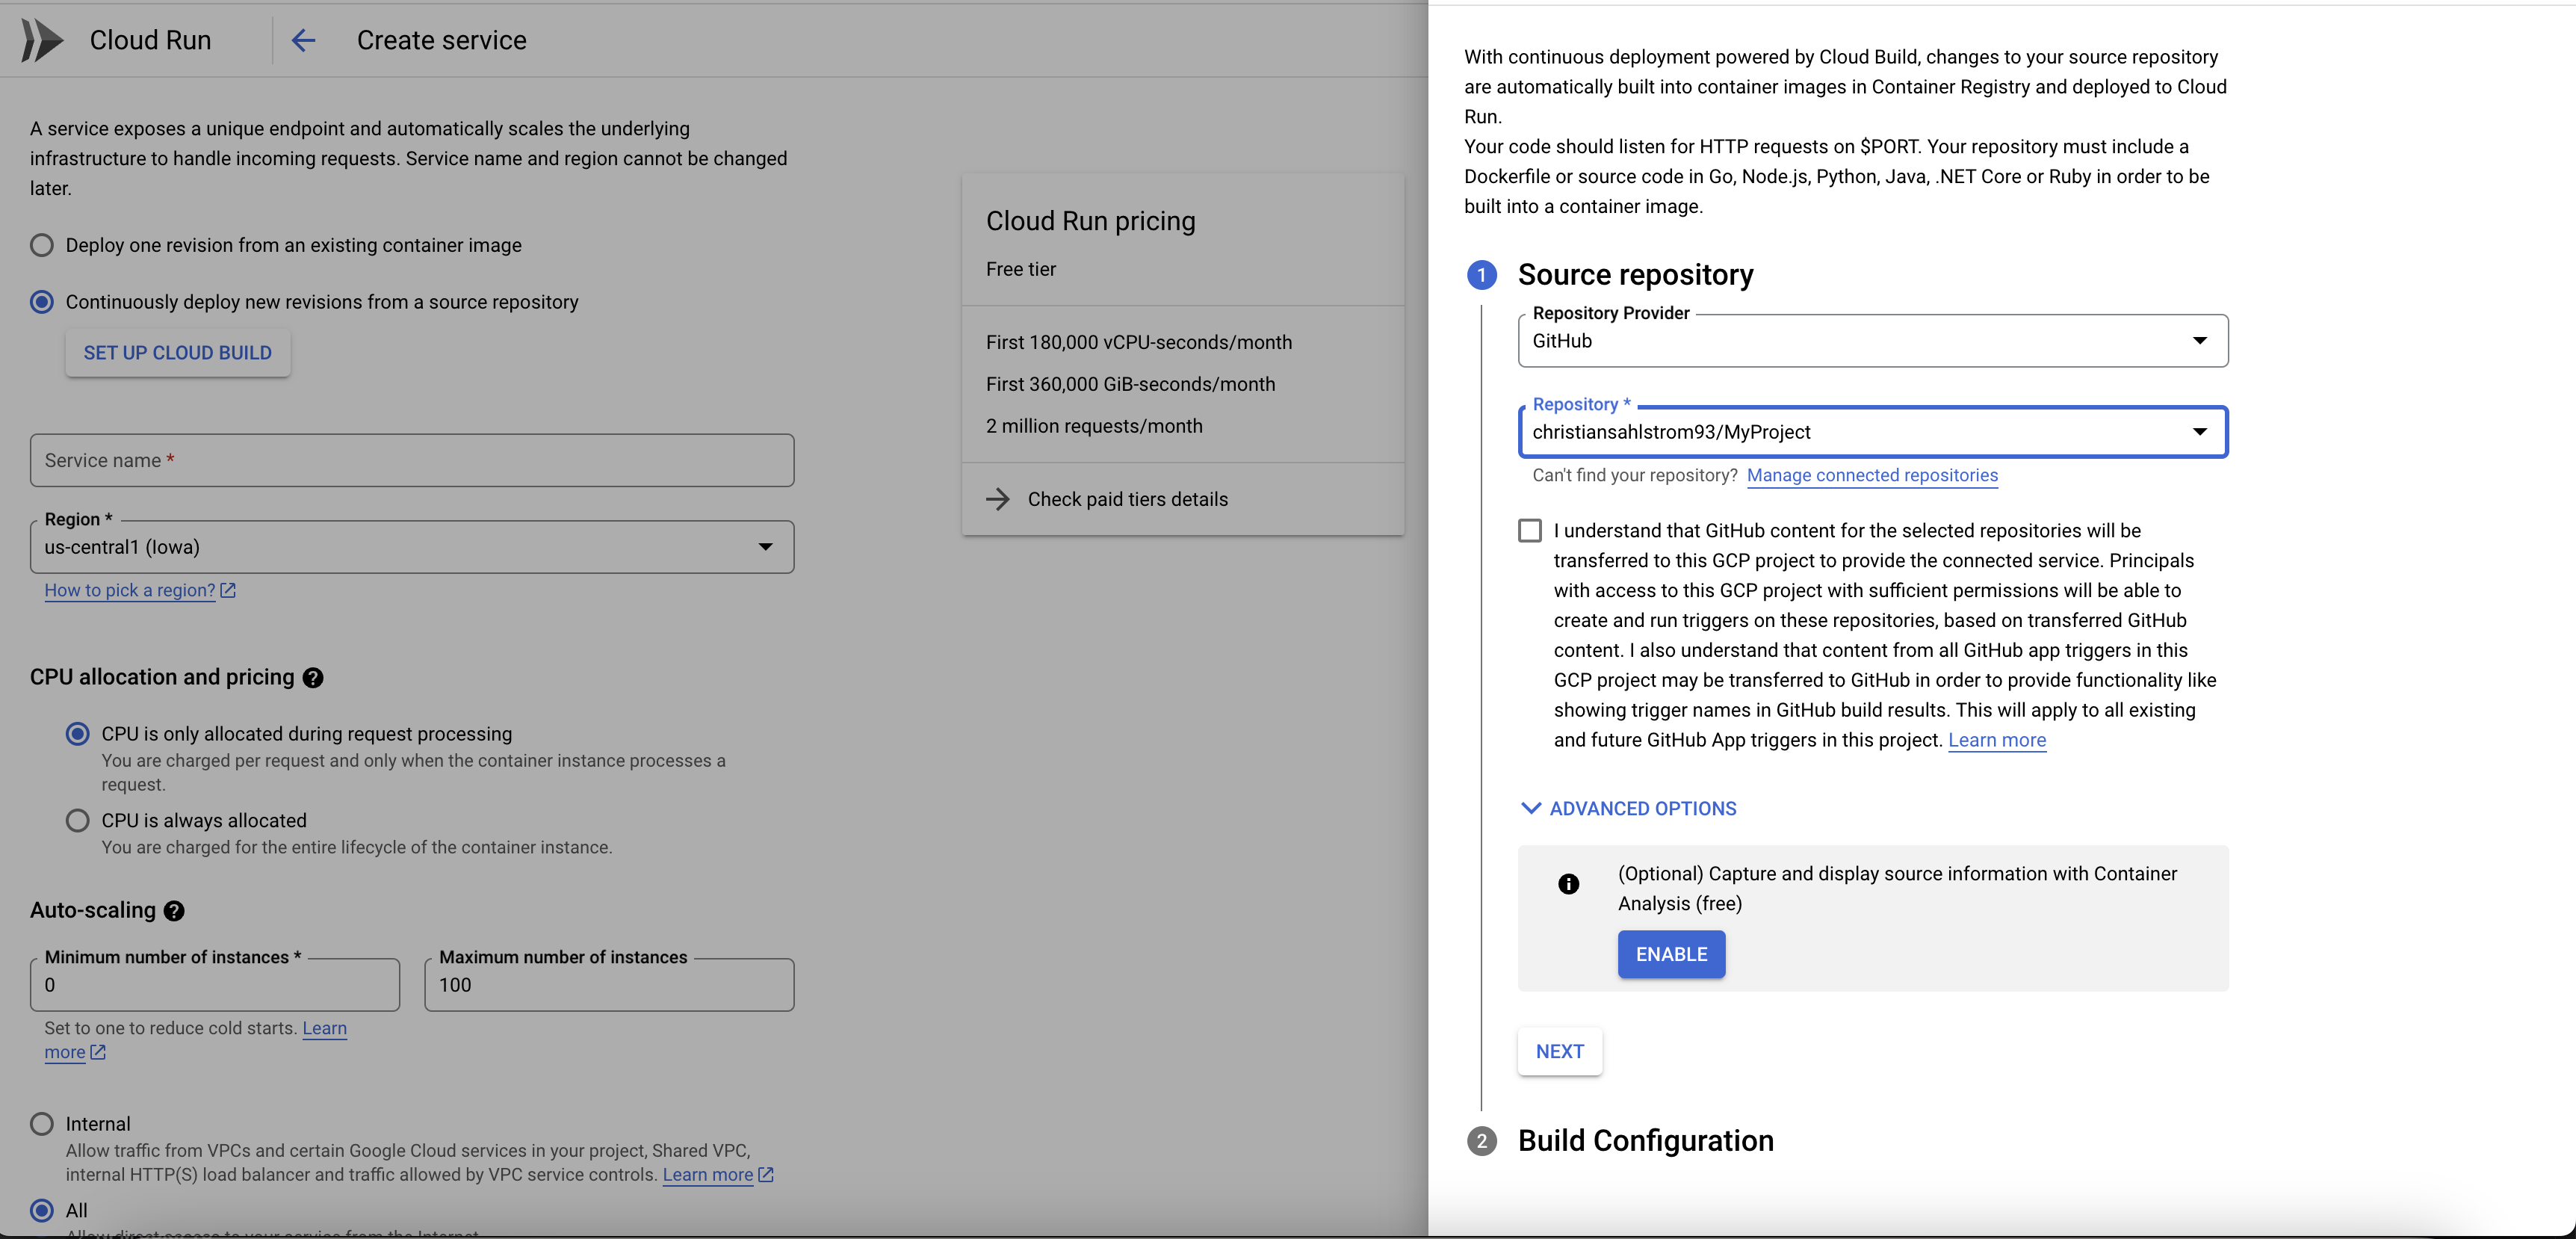
- Select Github as repository provider, and then find your repo. NOTE: You need to authenticate to Github the first time.
- Click on
next - Type in the branch you want it to trigger on
- Click on Dockerfile as
Build typeand type in/Dockerfileas source location
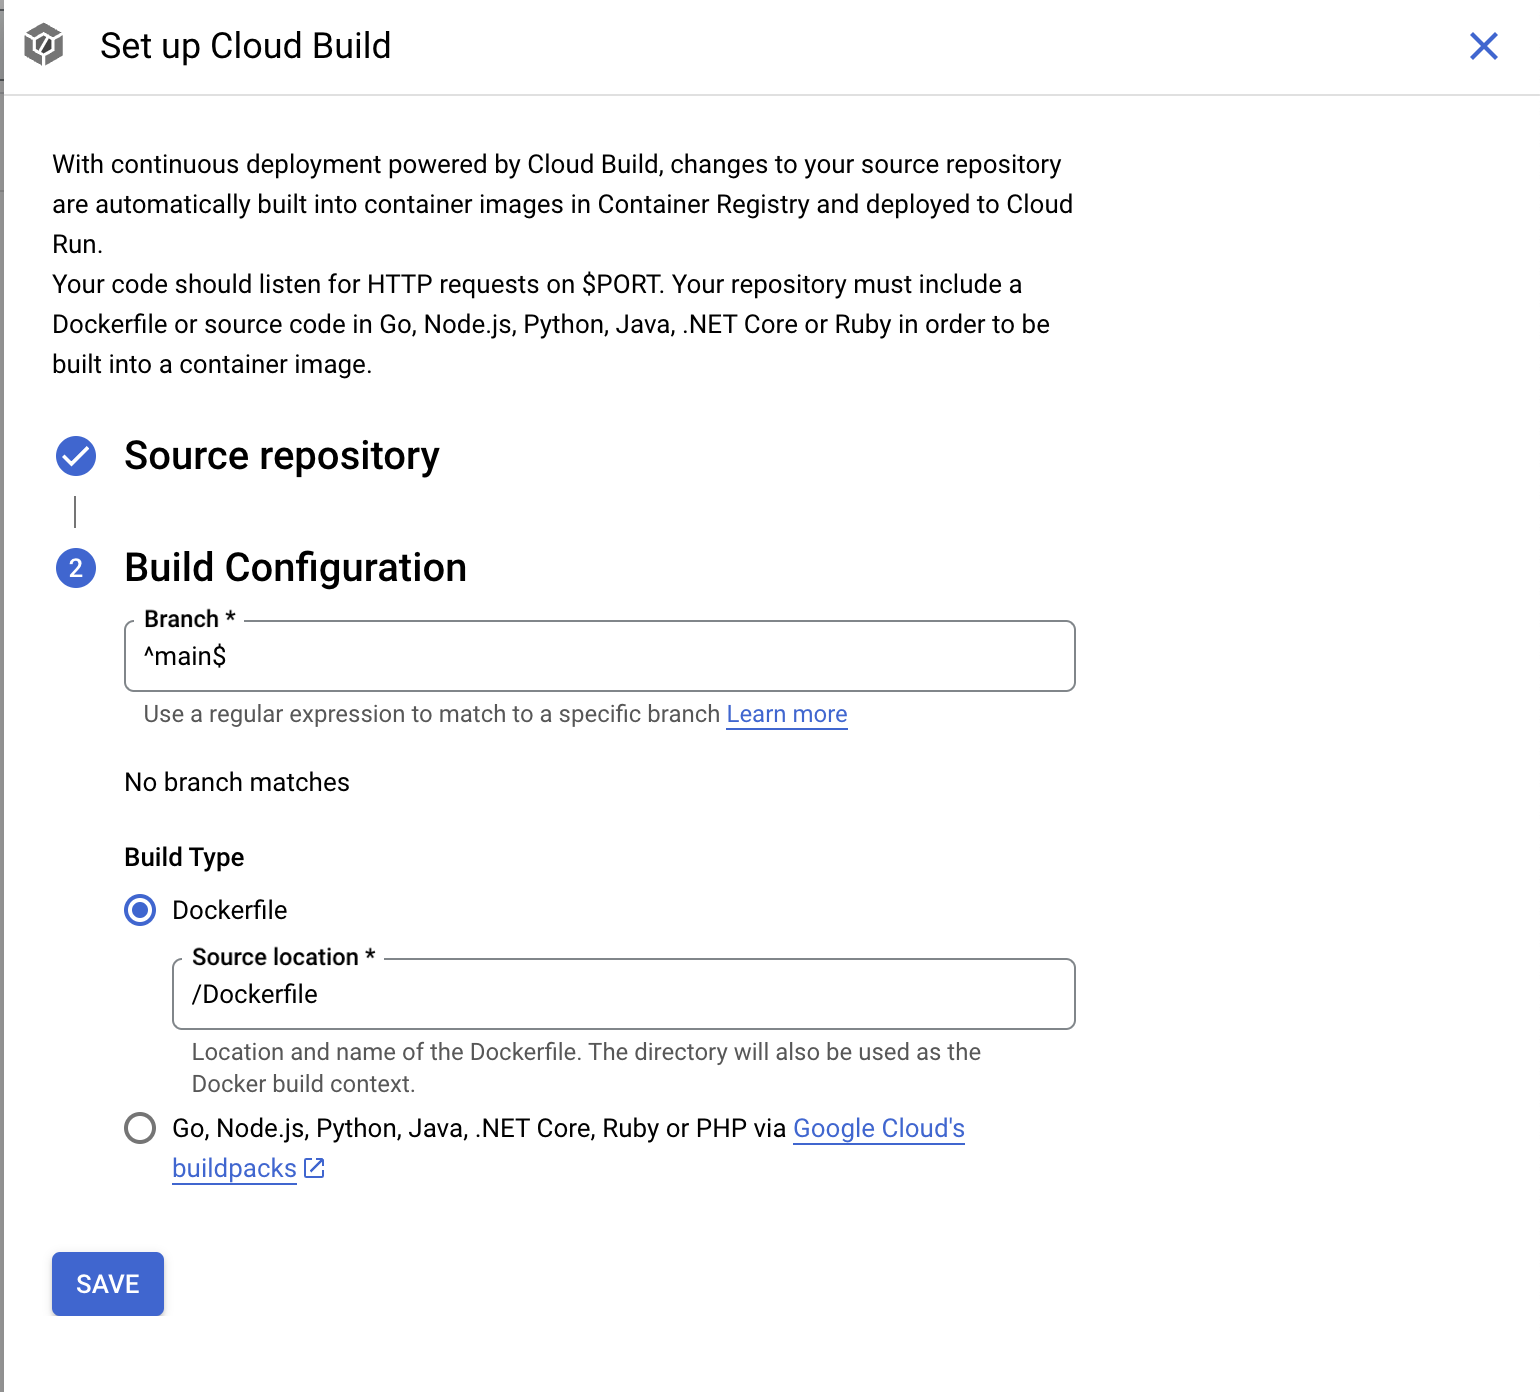
- Click
save - Fill in the rest of the form for creating the Cloud Run.
- Click
create
Now it is set up, and if you push to the branch that you selected in the form, it should trigger a build and deploy it to Cloud Run.
All right. Now everything should be working and you should be able to see your application on the URL provided by the Cloud Run service.
Summary
In this guide we covered how to deploy our React application to Cloud Run using Cloud Build with a trigger to our Github repository which reacts to each push we make to the branch. We also covered how to config a Dockerfile and handle client side routing in our production build.
I hope you found this interesting and helpful. See you in the next tutorial!
 Fri Mar 17 2023